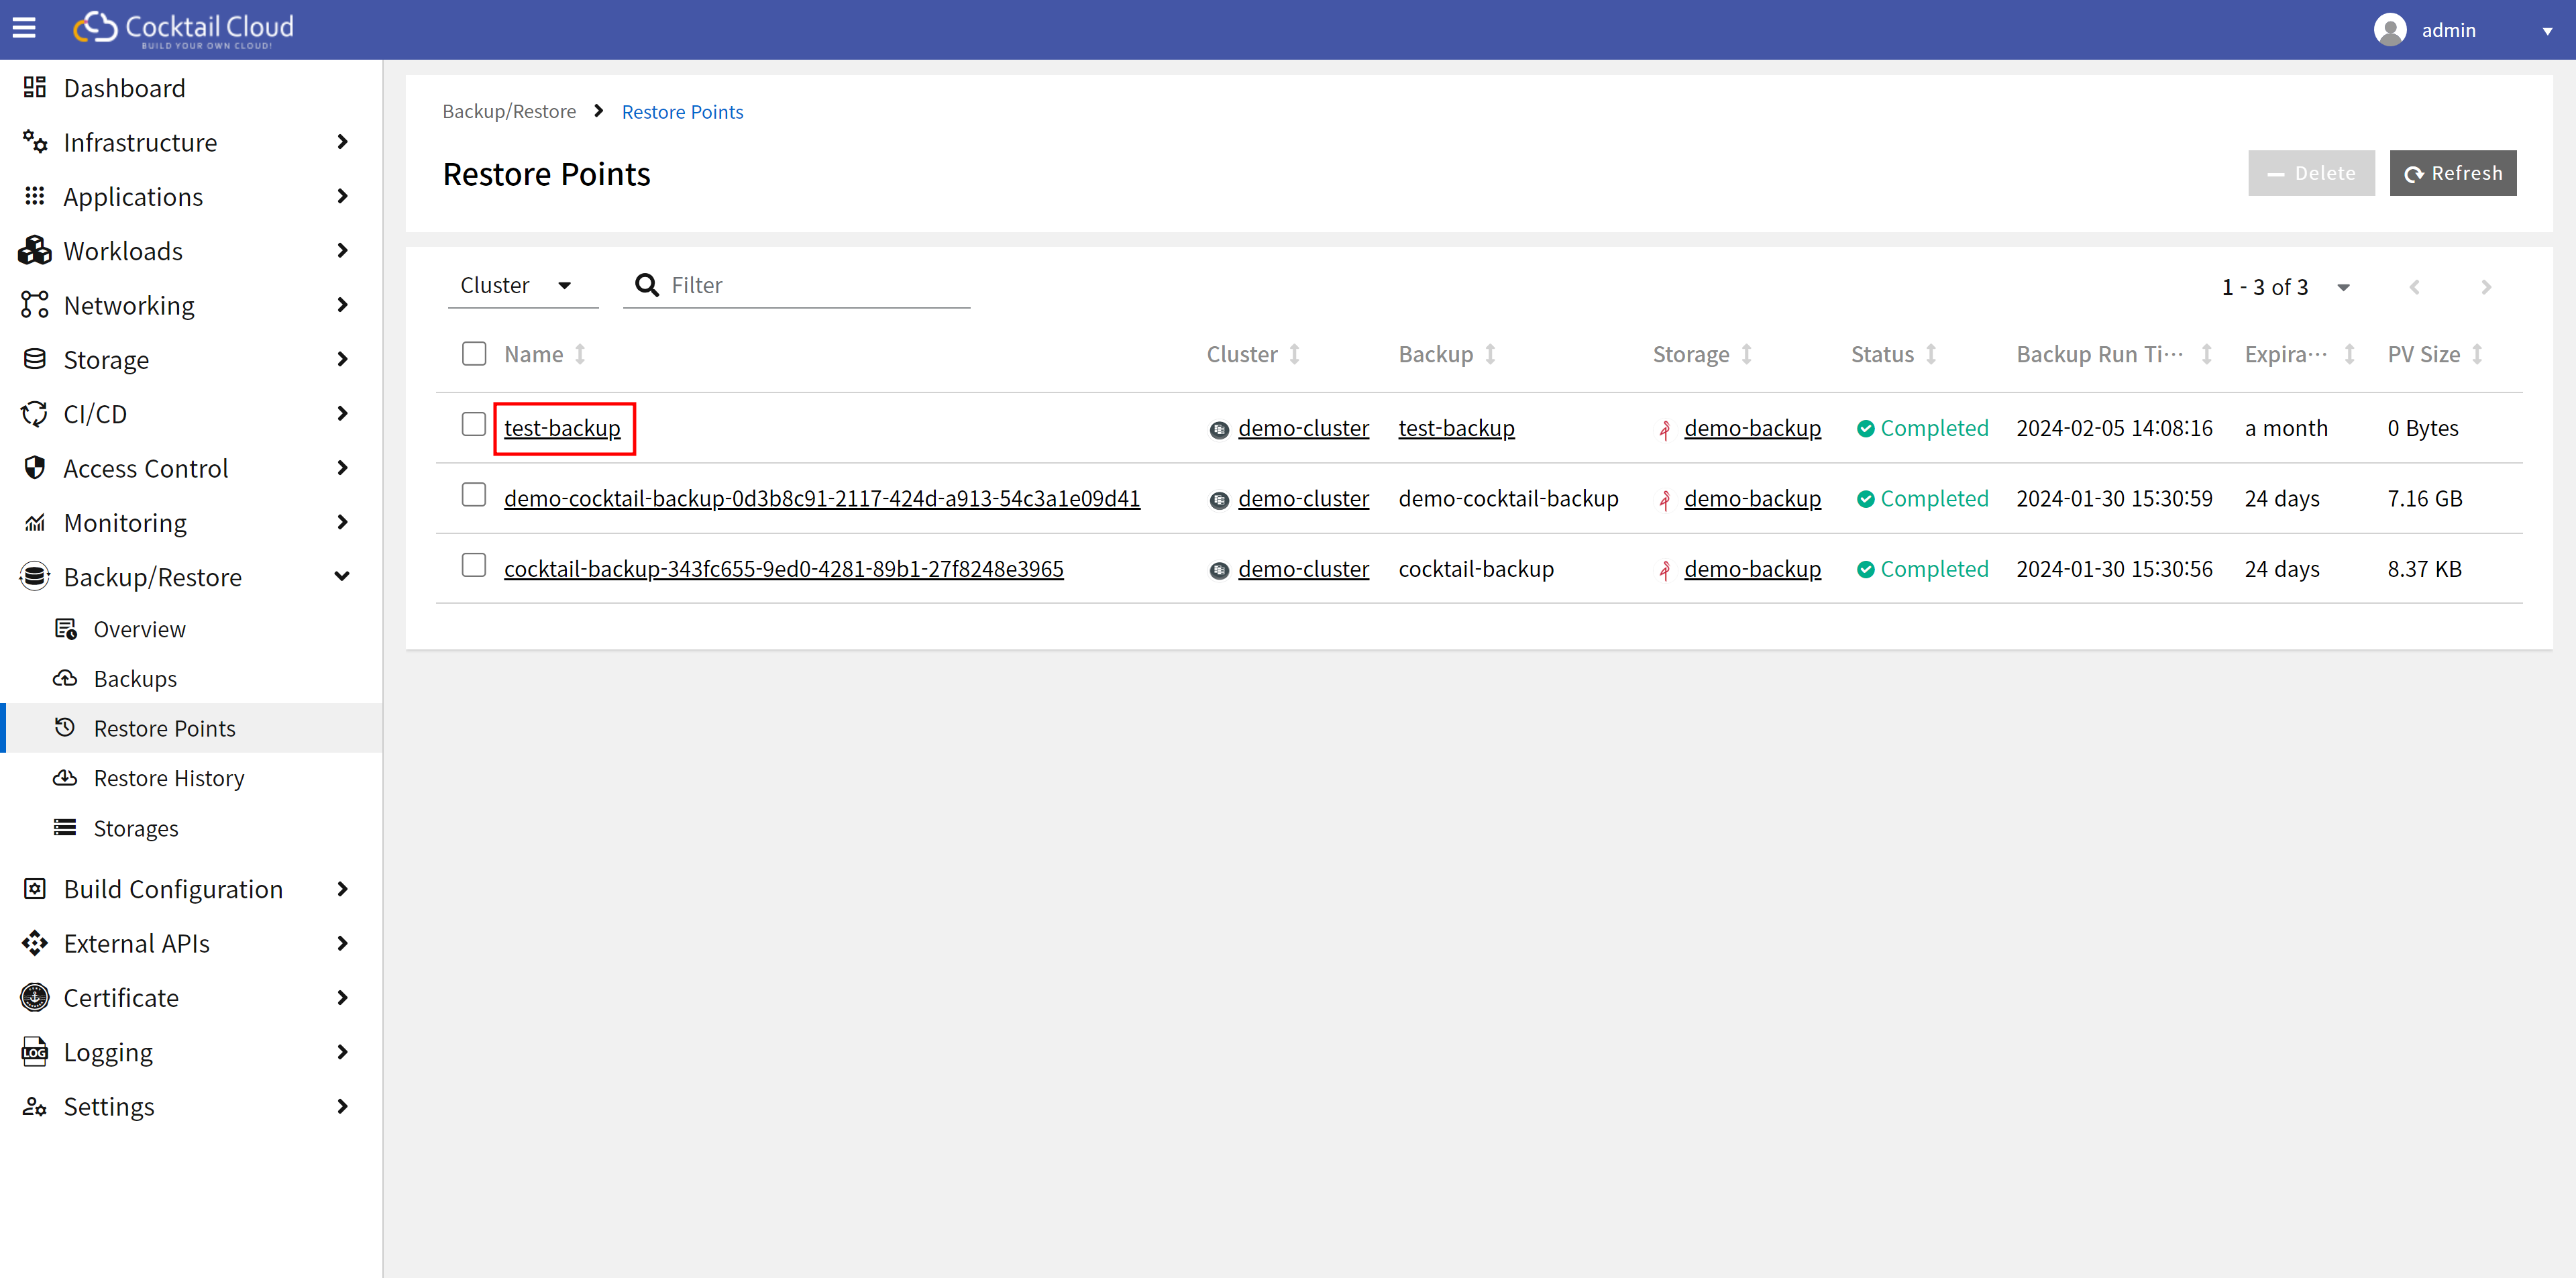

[Screen] Restore Point - Restore

[Screen] Restore Creation

[Screen] Restore Creation - Restore Scope

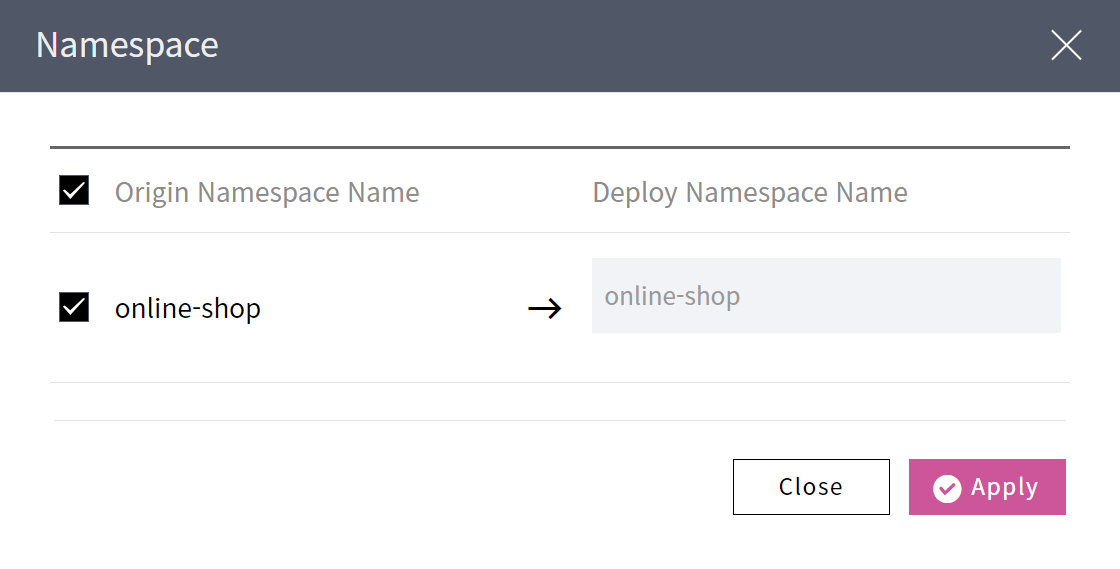
[Screen] Restore Creation - Namespace
 Click the icon to select the namespace.
* If you want to restore to a new or different namespace, enter the namespace name in \[Deploy Namespace Name]
* Click the \[Apply] button.
Click the icon to select the namespace.
* If you want to restore to a new or different namespace, enter the namespace name in \[Deploy Namespace Name]
* Click the \[Apply] button.
[Screen] Restore Creation - Namespace Popup

[Screen] Restore Creation - Namespace Confirmation
 Click the icon to enter the name and value.
* The restoration target is limited to resources that satisfy all specified label conditions.
Click the icon to enter the name and value.
* The restoration target is limited to resources that satisfy all specified label conditions.

[Screen] Restore Creation - Label Selector
Clicking the icon to select Old Storage Class and New Storage Class
* Click the \[Apply] button


[Screen] Restore Creation - Restore Target Configuration
| Item (* is required) | Content |
|---|---|
| Restore target cluster* | Cluster to restore (to be relocated) |
| Restore Name* | Restore Name |

[Screen] Restore Creation - Save

[Screen] Restore Creation - Save Popup

[Screen] Restore History List

[Screen] Restore History List - Name

[Screen] Restore Details

[Screen] Restore History - Check Box

[Screen] Restore History - Delete

[Screen] Restore History - Delete Popup

[Screen] Restore Details - Unable to view restoration information